How to Troubleshoot AC Blowing Hot: 7 Easy Fixes
That first wave of warm air from your vents often comes with an immediate worry about the cost of repairs. The good news is that the most expensive problem isn’t always the most likely one. A simple, five-minute fix could be all that stands between you and a cool, comfortable home. Before you resign yourself to a hefty bill, it’s smart to troubleshoot ac blowing hot air by ruling out the easy stuff. This article provides a practical checklist, starting with the most common and easily solved issues before moving on to the problems that signal it’s time to call in a professional for an honest diagnosis.
Key Takeaways
- Start with the basics: Many cooling problems have simple solutions. Before calling for service, always check that your thermostat is set to cool, the air filter is clean, and the circuit breaker hasn't tripped.
- Recognize signs that require a pro: For your safety, certain symptoms demand professional attention. These include a circuit breaker that repeatedly trips, any ice buildup on the unit, or hissing sounds, which often point to serious electrical or refrigerant problems.
- Embrace preventative maintenance: You can avoid most future breakdowns with consistent care. Make a habit of changing your air filter regularly and schedule an annual professional tune-up to keep your system running efficiently and reliably.
Why Is My AC Blowing Hot Air?
There’s nothing quite like the Florida heat to make you appreciate a working air conditioner. So, when your AC starts blowing hot air instead of cold, it’s more than an inconvenience; it’s an emergency. That initial feeling of dread is completely understandable, but before you assume the worst, take a deep breath. The good news is that the cause isn't always a catastrophic failure that will drain your bank account. Often, it's something you can identify and sometimes even fix yourself.
From a simple settings mix-up to a more complex mechanical issue, several culprits could be to blame. Understanding these common problems is the first step toward getting that cool, refreshing air flowing again. By checking the most likely suspects first, you can save yourself time, stress, and potentially a service call. Let's walk through the most frequent reasons your AC might be on the fritz, starting with the easiest fixes and working our way to the issues that require a professional touch.
Dirty Air Filters
Before you panic, check your air filter. This is one of the most common and easily solved reasons for an AC blowing warm air. Your air filter’s job is to trap dust, pollen, and other debris, but over time, it can become completely clogged. When that happens, it severely restricts airflow to your system. Think of it like trying to breathe with a hand over your mouth. Your AC unit has to work much harder to pull air through, which can cause it to overheat and stop cooling effectively. Swapping out a dirty filter is a simple task that can make a world of difference and is a key part of any regular AC maintenance routine.
Incorrect Thermostat Settings
It might sound too simple to be true, but it happens all the time. Someone in the house might have accidentally switched the thermostat from “cool” to “heat.” Another common mistake is changing the fan setting from “auto” to “on.” When the fan is set to “on,” it runs continuously, even when the cooling cycle is off. This means it will circulate air from your home that hasn't been cooled, making it feel like the AC is blowing warm air. Take a moment to check your thermostat settings; it could be the five-second fix you need to get back to feeling comfortable.
Low Refrigerant Levels
Refrigerant is the lifeblood of your air conditioner; it’s the chemical compound that absorbs heat from your home and releases it outside. If your system is low on refrigerant, it’s almost always because of a leak. Without enough of this crucial fluid, your AC simply can’t cool the air. You might notice other signs, like a hissing sound or ice forming on the refrigerant lines. Handling refrigerant requires special tools and certifications, so a leak is a clear signal that it’s time to call for professional AC repair. A technician can find and fix the leak before safely recharging the system.
Electrical Issues
Your air conditioning system relies on a series of electrical components to function correctly. If a part like a capacitor or contactor fails, it can prevent the outdoor compressor or fan from turning on. The indoor unit might still run and blow air, but without the outdoor unit working, that air won't be cooled. You might notice a buzzing sound from the unit or see that the outdoor fan isn't spinning. Electrical problems can be dangerous to handle on your own, so if you suspect an issue, it’s best to turn off the power at the circuit breaker and call for emergency service.
A Blocked Outdoor Unit
Your AC system has two main parts: an indoor unit and an outdoor unit. The outdoor unit, called the condenser, is responsible for releasing all the heat it has pulled from your home. To do this effectively, it needs plenty of clear space for airflow. If the condenser is blocked by overgrown bushes, covered in lawn clippings, or clogged with dirt and leaves, it can’t get rid of the heat. The system will overheat and struggle to cool your home, resulting in warm air from your vents. Take a quick walk outside and make sure the area around your unit is clean and clear of any debris.
Frozen Evaporator Coils
It seems counterintuitive, but a layer of ice on your indoor evaporator coils will stop your AC from cooling. This ice buildup blocks air from passing over the coils, so the air that does get through is warm. Freezing is usually a symptom of another problem, most often poor airflow from a dirty filter or low refrigerant levels from a leak. If you suspect your coils are frozen, turn the AC system off completely but leave the fan running to help the ice melt. Once it has thawed, you’ll still need a professional to diagnose the underlying problem and prevent it from happening again.
How to Check Your Thermostat
Before you start worrying about complex mechanical problems, let’s look at the easiest place to start: your thermostat. Think of it as the brain of your air conditioning system. Sometimes, a simple settings mix-up is all that stands between you and a cool, comfortable home. It’s a surprisingly common issue, and checking it first can save you a lot of time and stress. Walking through these quick checks will help you rule out the simple stuff before you suspect a bigger problem.
Confirm It's in Cooling Mode
It might sound obvious, but you’d be surprised how often this is the culprit. During Florida's brief cool spells, you might have switched the system to "heat" and forgotten to change it back. Take a look at your thermostat and make sure the switch or setting is on "cool." If it’s set to "heat" or "fan," it won't cool your home. On some digital models, you might need to cycle through the modes to find the right one. It’s a simple step, but confirming this setting is the essential first move in figuring out why your AC is blowing warm air.
Check the Temperature Setting
Once you've confirmed you're in cooling mode, check the temperature setting. For your AC to turn on, the set temperature must be lower than the current temperature in the room. If you have it set to 78 degrees and the room is already 75, the system won't engage. Try lowering the thermostat by at least five degrees and wait a few minutes to see if cool air starts to flow. If this simple adjustment doesn't trigger the system, the problem might be something else. When basic thermostat checks don't solve the issue, it could point to a deeper problem requiring professional air conditioning repair.
Replace the Batteries
If you have a digital thermostat, it likely runs on batteries. When those batteries get low, the thermostat can’t properly communicate with your AC system. This can lead to all sorts of issues, including a blank screen or incorrect temperature readings that prevent your AC from cooling. Most thermostats have a low-battery indicator, but it’s easy to miss. Pop the cover off and replace the batteries with a fresh set. It’s a good practice to change them once a year anyway to prevent this from happening, especially before the peak summer heat arrives.
Test Its Functionality
If the settings are correct and the batteries are fresh, there's one more thing you can try. Switch the fan setting from "auto" to "on." If the fan kicks in and air starts blowing from your vents (even if it's still warm), it tells you the thermostat is communicating with the blower. This often means the problem lies within the cooling components of your AC unit itself. If nothing happens, or if you've tried everything else, it's time to stop troubleshooting. For your safety and to avoid causing more damage, it's best to contact us and let a certified technician take a look.
What to Inspect on Your AC Unit
If your thermostat checks out, it’s time to take a look at the AC unit itself. Don’t worry, you don’t need to be an HVAC expert for these steps. These are simple visual inspections you can do to pinpoint the problem. Just remember to always prioritize safety. Before you inspect any components, it’s a good idea to turn off the power to your AC unit at the circuit breaker.
Check the Air Filter
Your AC’s air filter is one of the most common culprits behind cooling issues. A clogged filter suffocates your system, blocking airflow and forcing it to work much harder. This strain can easily lead to your unit blowing warm air instead of cool. Find the filter, which is usually located in the indoor air handler or a return air duct in your wall or ceiling. Slide it out and hold it up to a light. If you can’t see light through it, it’s definitely time for a replacement. Making a habit of checking your filter monthly is a core part of any good air conditioning maintenance routine and can prevent a lot of headaches.
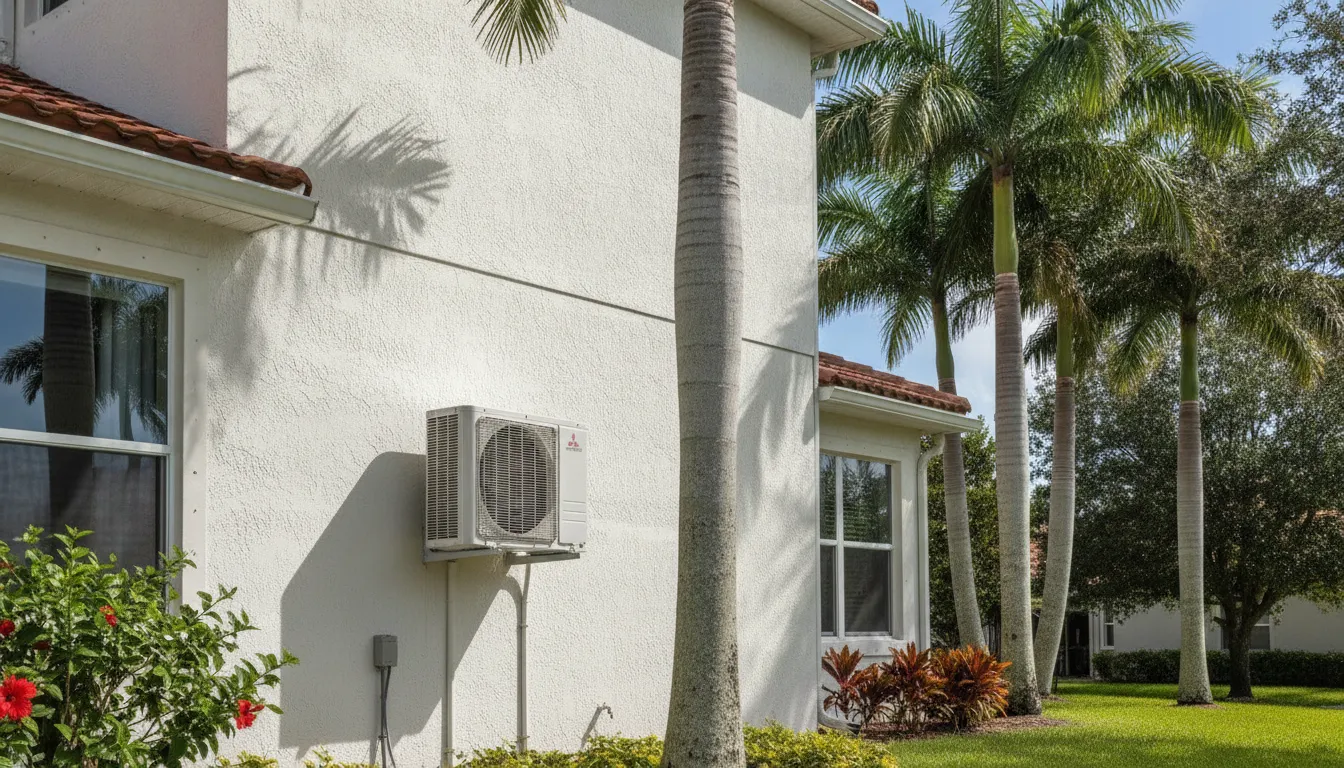
Clear the Outdoor Unit
Your outdoor unit, also known as the condenser, has an important job: it releases the heat pulled from inside your home. To do this effectively, it needs plenty of breathing room. Take a walk outside and check on it. Are there leaves, grass clippings, or dirt caked onto the sides? Is a bush growing a little too close? Gently clear away any debris from the unit and trim back surrounding plants to give it at least two feet of clearance on all sides. This simple cleanup helps the condenser dissipate heat properly, which can make a huge difference in its cooling performance.
Look for Ice on the Coils
Ice on your AC unit might seem counterintuitive when it’s blowing hot air, but it’s a clear sign that something is wrong. Usually, this ice forms on the evaporator coil inside your indoor air handler. A frozen coil is often caused by restricted airflow from a dirty filter or low refrigerant levels. If you see ice, turn your AC system off completely to allow it to thaw. This can take several hours. Once it’s fully melted, you can try running it again (with a clean filter, of course). If the ice comes back, you likely have a bigger issue that needs professional air conditioning repair.
Inspect the Circuit Breaker
Sometimes the fix is as simple as flipping a switch. Your air conditioner is a powerful appliance that uses two separate circuits: one for the indoor unit and one for the outdoor unit. If the outdoor unit isn't running at all, head to your home’s main electrical panel. Look for the breakers labeled "AC," "Air Conditioner," or "HVAC." If one of them is in the middle or "off" position, it has tripped. Flip it firmly back to the "on" position. If the breaker trips again right away, don't keep resetting it. This indicates an electrical problem that requires a professional technician to diagnose safely.
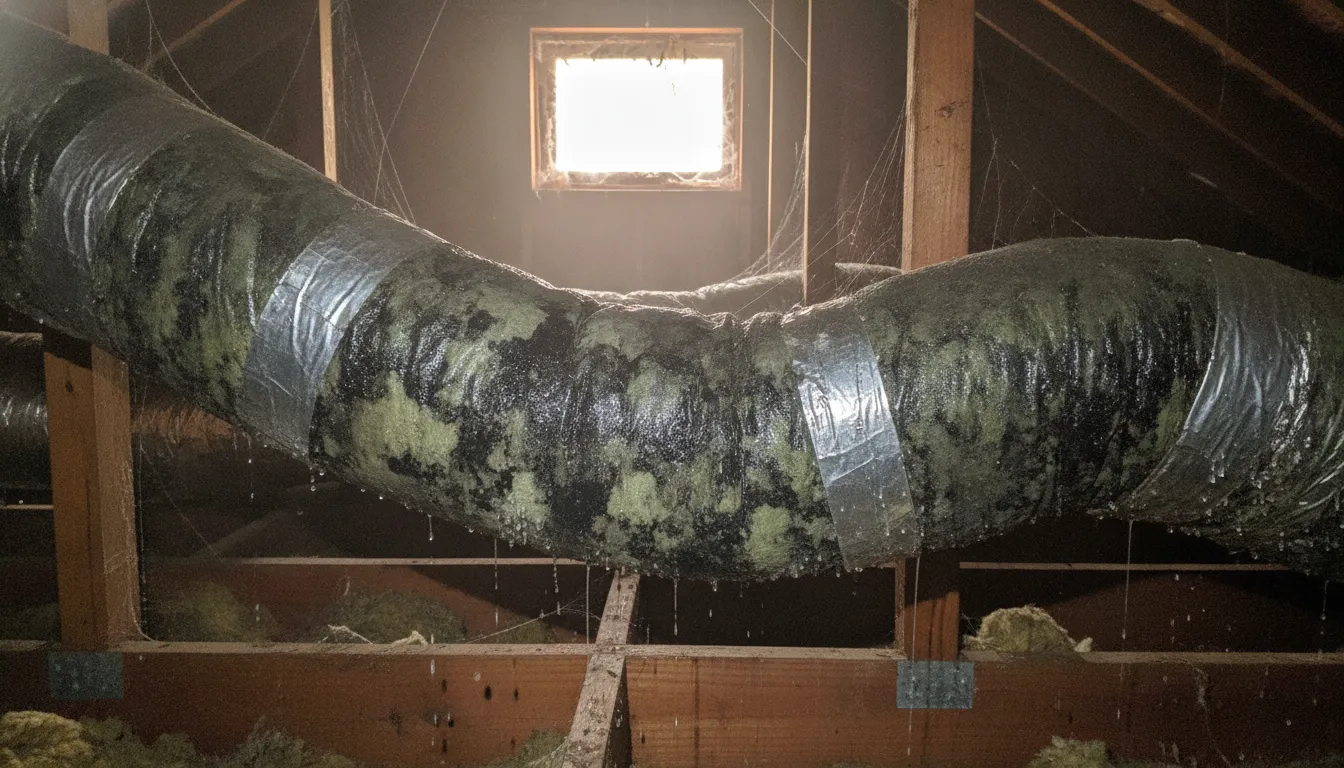
Examine Your Ductwork
Your ductwork is the delivery system for all that cool air. If it’s damaged or disconnected, the conditioned air could be leaking into your attic or crawlspace instead of your living areas. While most of your ducts are hidden, you can do a quick check. Feel the airflow coming out of your vents. Is it weak in some rooms but strong in others? Can you see any obvious tears or disconnected sections in the ductwork you can access? Poor airflow is a sign that your ducts may need attention. A professional inspection can identify leaks and ensure your system is running efficiently, improving your overall indoor air quality.
Check the Condensate Drain Line
Your AC doesn't just cool the air; it also removes humidity. This moisture is collected and drained away through a small PVC pipe, usually located outside near your condenser unit. If this condensate line gets clogged with algae or debris, water backs up inside your unit. Most systems have a safety float switch that will shut down the cooling process to prevent water damage. If your AC is running but you don’t see any water dripping from the pipe outside, you might have a clog. Clearing this line can sometimes solve the problem, but if you’re unsure how, it’s best to contact us for help.
Your Step-by-Step Troubleshooting Guide
When your AC starts blowing hot air, it’s tempting to panic, especially in the Florida heat. But before you pick up the phone, there are a few simple steps you can take to diagnose the problem. This guide will walk you through a safe and logical troubleshooting process. By checking a few key areas, you might find a quick fix and get your cool air flowing again in no time. Let’s get started.
Start with Safety and Power Checks
First things first, head to your thermostat and turn the AC system completely off. Running your air conditioner when it isn't working correctly can cause more serious damage to expensive components, like the compressor. Once the system is off, go to your home’s electrical panel and check for a tripped circuit breaker labeled "AC" or "Air Conditioner." If it’s tripped, flip it back to the "On" position. Sometimes, a simple power surge is the culprit. If the breaker trips again right away, leave it off and call a professional, as this indicates a more serious electrical issue.
Inspect Each Component
With the power off, you can safely look at a few key parts. Start with your thermostat. Is it set to "Cool"? It's a common mistake for it to be accidentally switched to "Heat" or "Fan." Also, check if the batteries need replacing. Next, head outside to your condenser unit. Look for any obvious obstructions like leaves, dirt, or branches piled up against the sides, and clear them away to ensure proper airflow. A blocked unit can't release heat effectively, which can lead to it blowing warm air inside. If you notice any damage, it's best to leave it to a professional air conditioning repair technician.
Test Airflow and Temperature
Poor airflow is a frequent cause of AC problems. The main offender is usually a dirty air filter. A clogged filter forces your system to work much harder, which can cause it to overheat and shut down the cooling process to protect itself. Check your filter and if it’s visibly dirty, replace it with a new one. If you noticed any ice on your indoor or outdoor unit, a dirty filter is often the cause. After replacing the filter, make sure you allow the unit to thaw completely before turning it back on. Consistent filter changes are a core part of any good air conditioning maintenance routine.
Try a System Reset
If you’ve checked the breaker, cleaned the outdoor unit, and replaced the filter, but the AC still won't blow cold air, a full system reset is the next step. At your circuit breaker, flip the AC’s breaker to the "Off" position. Go back to your thermostat and turn it off as well. Wait for about 30 minutes. This allows the system's internal circuits to reset. After the wait, turn the circuit breaker back on first, and then turn your thermostat back to "Cool." If your AC kicks on and starts cooling, you’re all set. If not, it’s time to contact us for professional help.
How to Identify Refrigerant Problems
Refrigerant is the essential chemical that allows your air conditioner to cool your home by absorbing heat and moving it outside. It operates in a closed-loop system, so it should never "run low" unless there's a leak. A refrigerant issue can strain your system, reduce its efficiency, and eventually lead to a total breakdown. Knowing how to spot the warning signs is key to catching the problem before it turns into a major, expensive repair. Here’s what to look for if you suspect your AC’s refrigerant levels are off.
Signs of Low Refrigerant
The most common sign of low refrigerant is your AC blowing warm or room-temperature air instead of cold air. You may also notice that your system runs for much longer than it used to, struggling to reach the temperature set on your thermostat. This extra work will often show up on your next utility bill. Another major red flag is ice or frost building up on the copper refrigerant lines connected to your outdoor unit. While it might seem strange, low refrigerant levels cause the pressure to drop, making the evaporator coil colder than normal and causing moisture in the air to freeze on its surface.
How to Spot a Leak
Because low refrigerant almost always means there’s a leak somewhere, finding the source is the next step. While you might not see the refrigerant itself, you can often find clues. Listen for a faint hissing or bubbling noise near your indoor or outdoor AC unit, which can signal escaping gas. Visually inspect the refrigerant lines and connections for any oily residue. The refrigerant circulates with a special oil, and if it leaks, the oil comes with it. If you see ice on the lines, that’s another strong indicator that something is wrong with the refrigerant levels.
When to Call a Pro for Refrigerant Issues
If you think you have a refrigerant leak, it’s time to call in a professional. Refrigerant is a chemical that requires certified handling, and attempting to fix a leak or recharge the system yourself is dangerous and often illegal. To prevent further damage to your AC’s compressor, a very expensive component, you should turn your system off immediately. A certified technician has the tools to accurately locate the leak, repair it properly, and recharge your system to the manufacturer’s specifications. Our team provides expert air conditioning repair to safely get your system running again.
When to Call an HVAC Professional
While there are plenty of troubleshooting steps you can handle on your own, some AC issues require a professional touch. Knowing when to put down the tools and pick up the phone is key to preventing further damage to your system and keeping yourself safe. If you’ve tried the basic fixes and your home still feels like a sauna, it’s probably time to call for backup. Certain problems, especially those involving electrical components or refrigerant, are best left to trained and licensed technicians who have the right tools and expertise to get the job done correctly. Attempting complex repairs without the right know-how can turn a small problem into a major, expensive one, or even create a safety hazard for your family.
At 5 Star Air, we believe in empowering homeowners, but we also want you to be safe. Think of us as your trusted partner for the tough stuff. When you’re dealing with the intricate machinery of an HVAC system, a small mistake can have big consequences. That’s why it’s important to recognize the line between a simple fix and a serious repair. Below, we’ll walk through the specific situations where a professional diagnosis is not just helpful, but necessary. This will help you make the best call for your home, your system, and your peace of mind.
For Your Safety with Electrical Work
Your home’s electrical system is not something to experiment with. While checking for a tripped breaker is a simple first step, you should proceed with caution. If you reset the breaker and it immediately trips again, that’s a red flag. This often points to a more serious electrical problem within the AC unit itself, like a short circuit or a failing compressor. Repeatedly trying to reset it can be a fire hazard. For your safety, it’s best to leave the panel alone and schedule an emergency AC service call. Our technicians can safely diagnose the underlying electrical fault.
When Refrigerant Is Involved
Refrigerant is the lifeblood of your air conditioner, but it’s also a hazardous chemical that requires special handling. If your system is low on refrigerant, it’s because there’s a leak somewhere. This isn't a DIY fix. You can't just top it off like you would with oil in your car. A certified technician needs to locate and repair the leak before recharging the system with the correct amount of refrigerant. Handling refrigerant without a license is illegal and unsafe, so if you suspect a leak, it’s crucial to call a professional for air conditioning repair.
For Complex Diagnostics and Repairs
Sometimes, the problem isn't as simple as a dirty filter or a wrong thermostat setting. Issues like a malfunctioning compressor, a faulty capacitor, or persistent electrical shorts require deep technical knowledge and specialized diagnostic tools. These components are the heart of your AC system, and trying to fix them without proper training can lead to more expensive damage or a complete system failure. If you’ve gone through the basic troubleshooting steps and are still stumped, it’s time to let an expert take over. Our team can provide an honest and accurate diagnosis.
Warning Signs You Shouldn't Ignore
Your air conditioner will often give you clear signals when something is seriously wrong. Don’t ignore these warning signs, as they can indicate a problem that could worsen over time. It’s time to call a professional if you notice:
- Loud buzzing, hissing, or banging sounds coming from the unit.
- Ice forming on the outdoor unit or the refrigerant lines.
- The system runs constantly but never cools your home.
- Your circuit breaker keeps tripping every time the AC kicks on.
- The troubleshooting steps you’ve tried haven’t fixed the problem.
Common Troubleshooting Mistakes to Avoid
When your AC starts acting up, it’s natural to want to fix it yourself. A little troubleshooting can often save you time and money, but a few common missteps can actually make the problem worse. By avoiding these pitfalls, you can diagnose the issue more effectively and know when it’s the right time to call in a professional.
Misusing Your Thermostat
It’s a popular belief that cranking your thermostat down to a super low temperature will cool your home faster. Unfortunately, that’s not how air conditioners work. Your AC unit cools at a consistent rate, regardless of whether you set it to 75 or 65 degrees. Setting it extra low just forces the system to run longer to reach that target, wasting energy and putting unnecessary strain on the components. For efficient cooling, simply set the thermostat to your desired temperature and let it do its job.
Attempting Risky DIY Repairs
While changing an air filter is a great DIY task, some jobs are best left to the experts. Attempting complex electrical work or handling refrigerant without proper training is incredibly dangerous and can lead to serious injury or further damage to your system. If your troubleshooting points to a problem with wiring, capacitors, or refrigerant levels, it’s time to put the tools down. A professional air conditioning repair service has the right equipment and expertise to handle these issues safely and correctly.
Ignoring Early Warning Signs
That strange rattling noise or the slight decrease in airflow might seem like minor annoyances, but they are often your AC’s way of telling you something is wrong. Ignoring these early warning signs allows a small, fixable issue to grow into a major, expensive breakdown. If you notice your system is struggling, making unusual sounds, or not cooling as well as it used to, it’s best to investigate right away. Addressing problems early is the key to preventing a complete system failure on the hottest day of the year.
Overlooking the Simple Fixes
On the other hand, don’t assume every problem is a catastrophe. Before you panic, always check the basics. Is the thermostat set correctly? Is the air filter clogged? Has a circuit breaker tripped? Sometimes, the solution is surprisingly simple and takes just a few minutes to fix. Running through the basic troubleshooting steps first can save you the cost and hassle of a service call. Consistent air conditioning maintenance helps you stay on top of these simple fixes before they cause bigger issues.
How to Prevent Future AC Problems
After you’ve fixed the immediate problem, the last thing you want is a repeat performance. A little proactive care can save you from the stress and expense of future AC breakdowns, especially when the Florida heat is relentless. Staying ahead of potential issues is the key to keeping your home consistently cool and your energy bills in check. Think of it as simple insurance for your comfort. By building a few habits and scheduling professional help, you can keep your system running smoothly for years to come.
Follow a Regular Maintenance Schedule
One of the easiest and most effective things you can do for your AC is to keep up with basic maintenance. Start with the air filter. A dirty filter restricts airflow, forcing your system to work harder, which drives up energy costs and can lead to bigger problems. Make it a habit to check your filter monthly and replace it every 1-3 months. This simple step not only improves efficiency but also supports better indoor air quality. Also, take a quick walk outside every few weeks to ensure your outdoor unit is clear of leaves, branches, and other debris that could block airflow.
Prepare Your System for the Season
Here in Florida, our air conditioners don't get much of a break. That's why it's so important to prepare your system before the peak heat of summer arrives. Having a professional service your AC in the spring ensures it's clean and ready for the demanding months ahead. A pre-season check-up can catch minor issues, like small leaks or worn parts, before they turn into major failures in the middle of a July heatwave. It’s a smart, preventative step that gives you peace of mind knowing your system is prepared to handle the workload.
Schedule Professional Tune-Ups
While changing filters is a great DIY task, some things are best left to the experts. An annual professional tune-up is crucial for the health and longevity of your AC unit. During a maintenance visit, a technician will perform a comprehensive inspection that goes far beyond a simple filter change. They’ll clean the coils, check refrigerant levels, test electrical components, and make sure the whole system is operating safely and efficiently. Scheduling regular air conditioning maintenance not only prevents unexpected breakdowns but also helps your unit run at peak performance, saving you money on energy bills.
Related Articles
- 5 Signs Your AC Needs Repair
- How to Prepare Your HVAC for a Florida Summer
- HVAC Tips & Insights Blog - Expert Advice from 5 Star Air
- AC Repair Services
- AC Services
Frequently Asked Questions
I’ve read the troubleshooting steps, but I'm still a bit overwhelmed. What is the absolute first thing I should check? Before you worry about anything complex, always start with two simple things: your thermostat and your air filter. First, make sure your thermostat is set to "cool" and the temperature is set lower than the current room temperature. It's a surprisingly common mix-up. Second, check your air filter. A completely clogged filter can stop your system from cooling properly all by itself. These two checks take less than five minutes and solve the problem more often than you'd think.
My AC is blowing warm air, and I noticed the fan on the outdoor unit isn't spinning. What does that usually mean? When the indoor fan is blowing but the outdoor fan is still, it typically points to a problem with the outdoor unit itself. The most common causes are a failed capacitor, which helps the fan motor start, or an issue with the fan motor. Both of these are electrical components that store a powerful charge. For your safety, this is not a DIY fix. It's best to turn the system off at the breaker and call a professional technician to diagnose and handle the repair.
How can I tell if my AC unit is frozen without opening it up? You can often spot a frozen system without taking anything apart. The most obvious sign is a significant drop in airflow coming from your vents; the air might feel weak or barely blow at all. You might also see ice or frost forming on the copper refrigerant lines that run into your outdoor unit. If you suspect it's frozen, the best first step is to turn the cooling system off but leave the fan running to help it thaw out.
If I do need a professional repair, what should I expect in terms of cost? The cost of an AC repair can vary quite a bit because it depends entirely on what needs to be fixed. A simple fix like replacing a capacitor is relatively inexpensive, while a major issue like a refrigerant leak or a failed compressor will cost more. The age of your unit and whether any parts are still under warranty also play a role. A trustworthy company will always provide you with a clear, upfront price for the repair before any work begins, so you know exactly what to expect.
My AC unit is pretty old. How do I know if it's better to repair it or just replace the whole system? That's a great question, and it's a decision many homeowners face. A good rule of thumb is to consider the age of your system and the cost of the repair. If your unit is over 10-12 years old and the repair cost is close to half the price of a new system, replacement is often the smarter long-term investment. Frequent breakdowns are another sign that it might be time to upgrade. A new, more efficient unit can also save you a lot on your monthly energy bills.