Trane HVAC Installation Guide for Homeowners
Living in Southwest Florida means an air conditioner isn't a luxury; it's essential. When the heat and humidity are relentless, you need a system you can count on. Trane has earned its reputation for building durable units that can handle our demanding climate, but that legendary performance depends entirely on a perfect installation. From withstanding salty air to managing high humidity, the way your system is installed directly impacts its ability to keep you cool and comfortable. Think of this as your complete Trane HVAC installation guide, created specifically to help Florida homeowners make smart choices and ensure their new system is set up for success.
Key Takeaways
- Find the perfect fit for your home: A successful Trane installation begins long before the tools come out. It starts with a professional load calculation to determine the right size unit and choosing a model with an appropriate SEER rating for Florida's climate.
- Professional installation is essential for performance and safety: Hiring a licensed technician is the only way to protect your warranty, ensure your system runs efficiently, and avoid the safety risks of improper electrical wiring or refrigerant handling.
- A smooth installation day is a team effort: You can help the process by clearing a path to the work areas and securing pets. In return, a professional team will protect your home, follow a precise installation plan, and thoroughly test the system to guarantee perfect operation.
Why Choose a Trane HVAC System?
When you’re thinking about a new HVAC system, you want a brand that delivers on its promises. Trane has built a reputation for quality and performance, making it a top choice for homeowners, especially here in Florida where our air conditioners work overtime. Choosing Trane means investing in reliable comfort for your home for years to come.
Top-Tier Energy Efficiency
We all know how high Florida energy bills can get during a heatwave. A major benefit of upgrading to a Trane system is its impressive energy efficiency. Modern units are engineered to cool your home using significantly less electricity than older models. In fact, replacing an AC unit that's over ten years old can reduce your cooling costs by up to 20%. It’s no surprise that Trane has been named America’s Most Trusted® HVAC Brand for 11 years in a row. A new air conditioning installation isn't just about staying cool; it's a smart investment in your home's efficiency.
Built to Last: Reliability and Warranty
An HVAC system is a long-term investment, so you need one that’s built to last. Trane systems are known for their durability, with an expected lifespan of around 15 years. This reliability gives you peace of mind, knowing your home will stay comfortable season after season. To protect that investment, a valid warranty is key, and that’s where professional installation makes all the difference. An improper installation can void your warranty and lead to performance issues. Our expert team ensures your system is set up correctly from the start, protecting your warranty and setting you up for years of efficient cooling.
How to Choose the Right Trane System for Your Home
Picking out a new Trane system isn’t just about grabbing the newest model off the shelf. It’s about finding the perfect match for your home’s unique needs, your budget, and our specific Florida climate. A system that’s just right will keep you comfortable for years, run efficiently, and save you money on your energy bills. Getting this choice right from the start is one of the most important steps in the entire process. Let’s walk through the key factors to consider so you can feel confident in your decision.
Find the Perfect Size for Your Home
When it comes to HVAC systems, bigger isn’t always better. A unit that’s too large will cycle on and off too frequently, failing to properly dehumidify your home and causing unnecessary wear and tear. A unit that’s too small will run constantly without ever reaching the set temperature. That’s why a professional load calculation is so important. A technician will assess your home’s size, layout, insulation, and window placement to determine the exact size you need. This ensures your new system provides consistent comfort and peak efficiency. It’s also often more cost-effective to get a complete air conditioning installation at once, especially if your current system is over a decade old.
What Do SEER Ratings and System Types Mean?
Think of a SEER (Seasonal Energy Efficiency Ratio) rating like a car's miles-per-gallon. The higher the SEER rating, the more energy-efficient the air conditioner is, which translates directly to lower electricity bills. While higher-SEER units can have a larger upfront cost, the long-term savings often make them a smart investment. A new Trane system is a major purchase that should last around 15 years, so it’s worth comparing models based on their efficiency, reliability, and warranty. We can help you explore different options and even discuss available financing to make your choice more manageable.
What to Consider for the Southwest Florida Climate
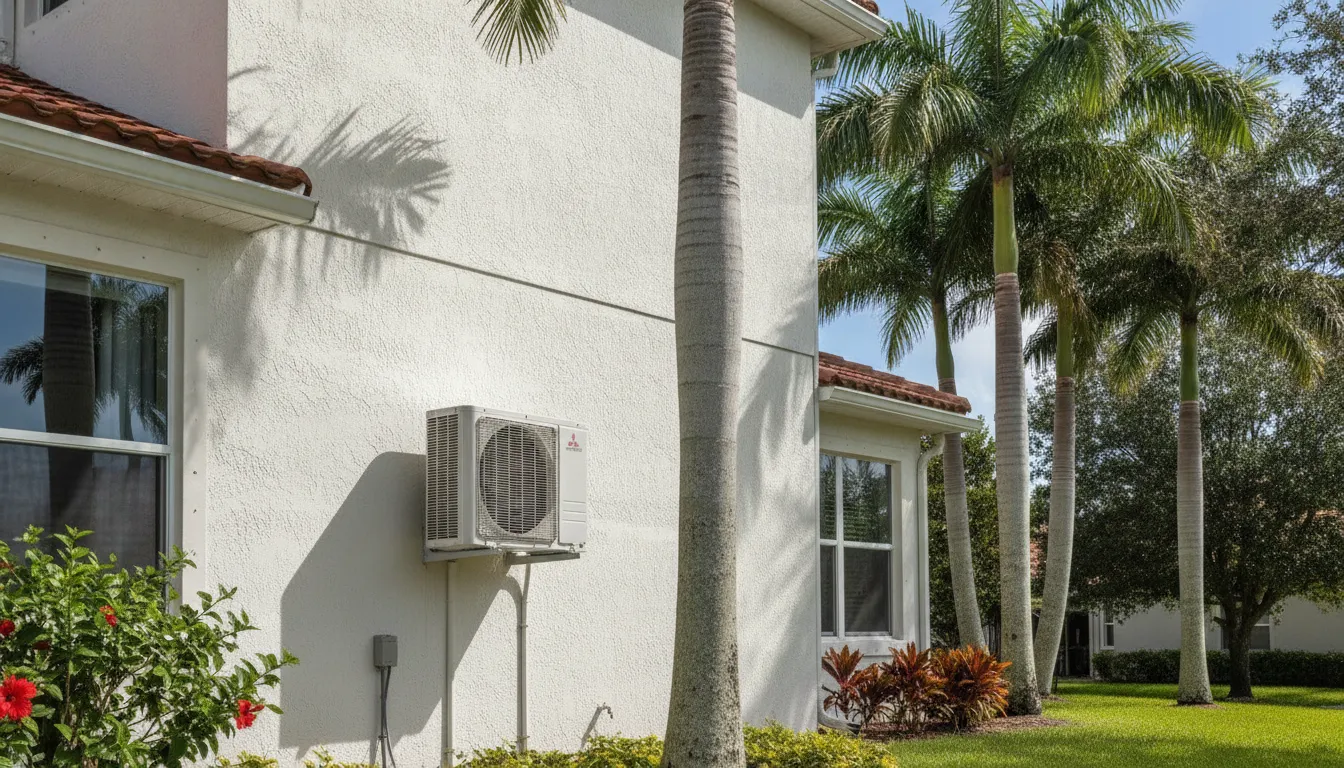
Living in Southwest Florida means your AC unit faces a unique set of challenges: intense heat, high humidity, and salty air. These elements can be tough on outdoor units, leading to corrosion and debris buildup that can cause system failures if not addressed. It’s crucial to choose a Trane system with features designed to withstand our coastal environment, such as corrosion-resistant coils. Proper installation and regular air conditioning maintenance are also key to protecting your system from the harsh local climate and ensuring it runs smoothly for its entire lifespan. We can recommend the best Trane models built to handle everything our beautiful but demanding weather throws at them.
What to Expect From a Trane Installation
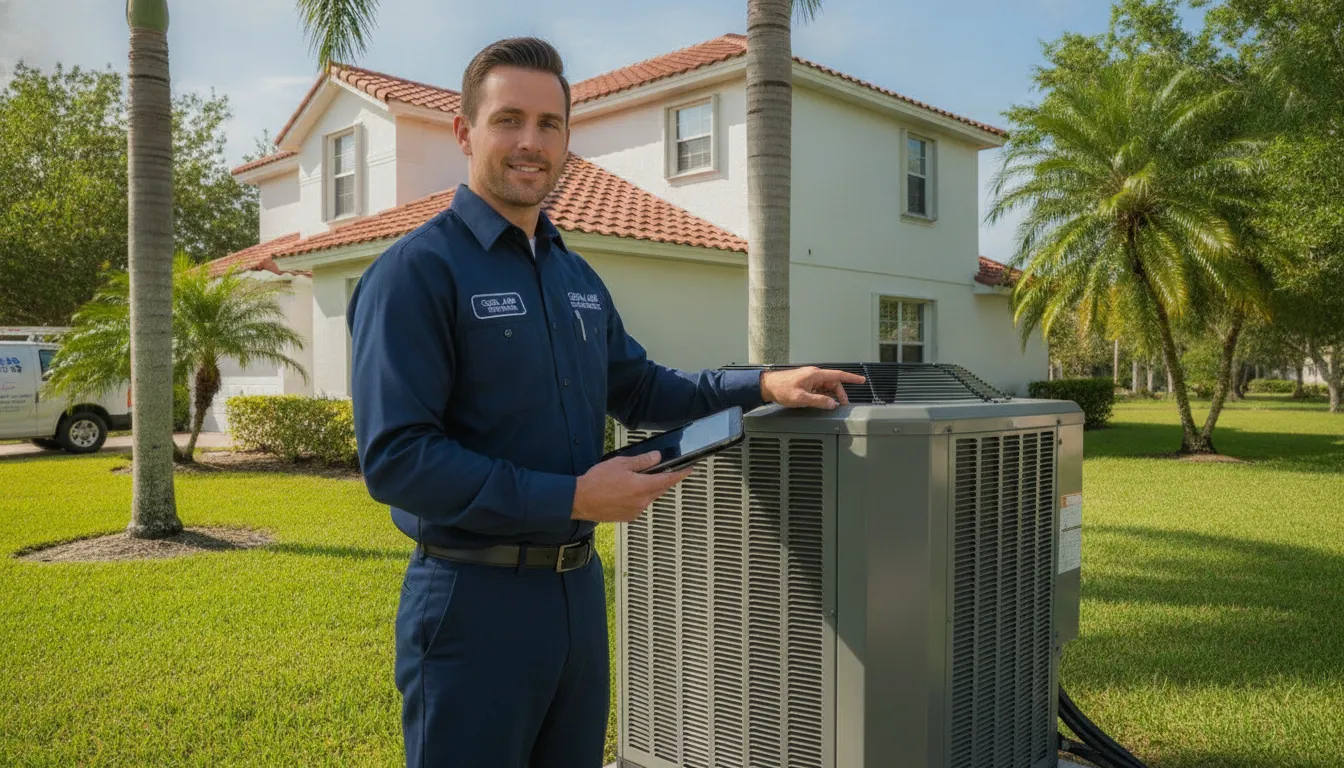
Getting a new air conditioner is a big deal, but the installation process itself should be straightforward and stress-free. When you work with a professional team, you can expect a clear, step-by-step process that leaves no room for guesswork. Knowing what’s coming can help you feel confident and prepared. From the initial home check-up to the final system test, every stage is designed to ensure your new Trane system works perfectly for your home.
At 5 Star Air, we believe in total transparency, so we want to walk you through exactly what our air conditioning installation looks like. Our process is thorough because we know that a great installation is the foundation for years of reliable comfort. Here’s a breakdown of the four main steps you can expect on the path to your new, high-efficiency Trane system.
Step 1: The Pre-Installation Home Assessment
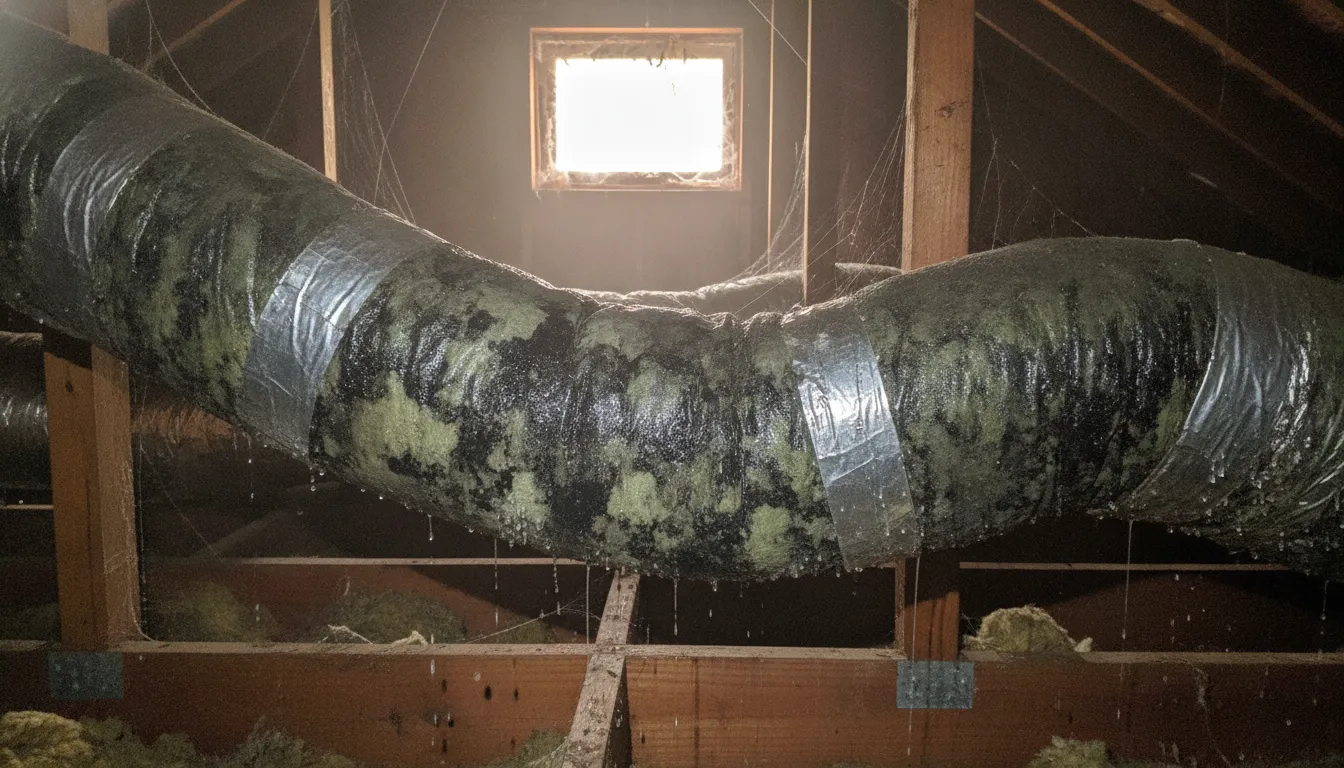
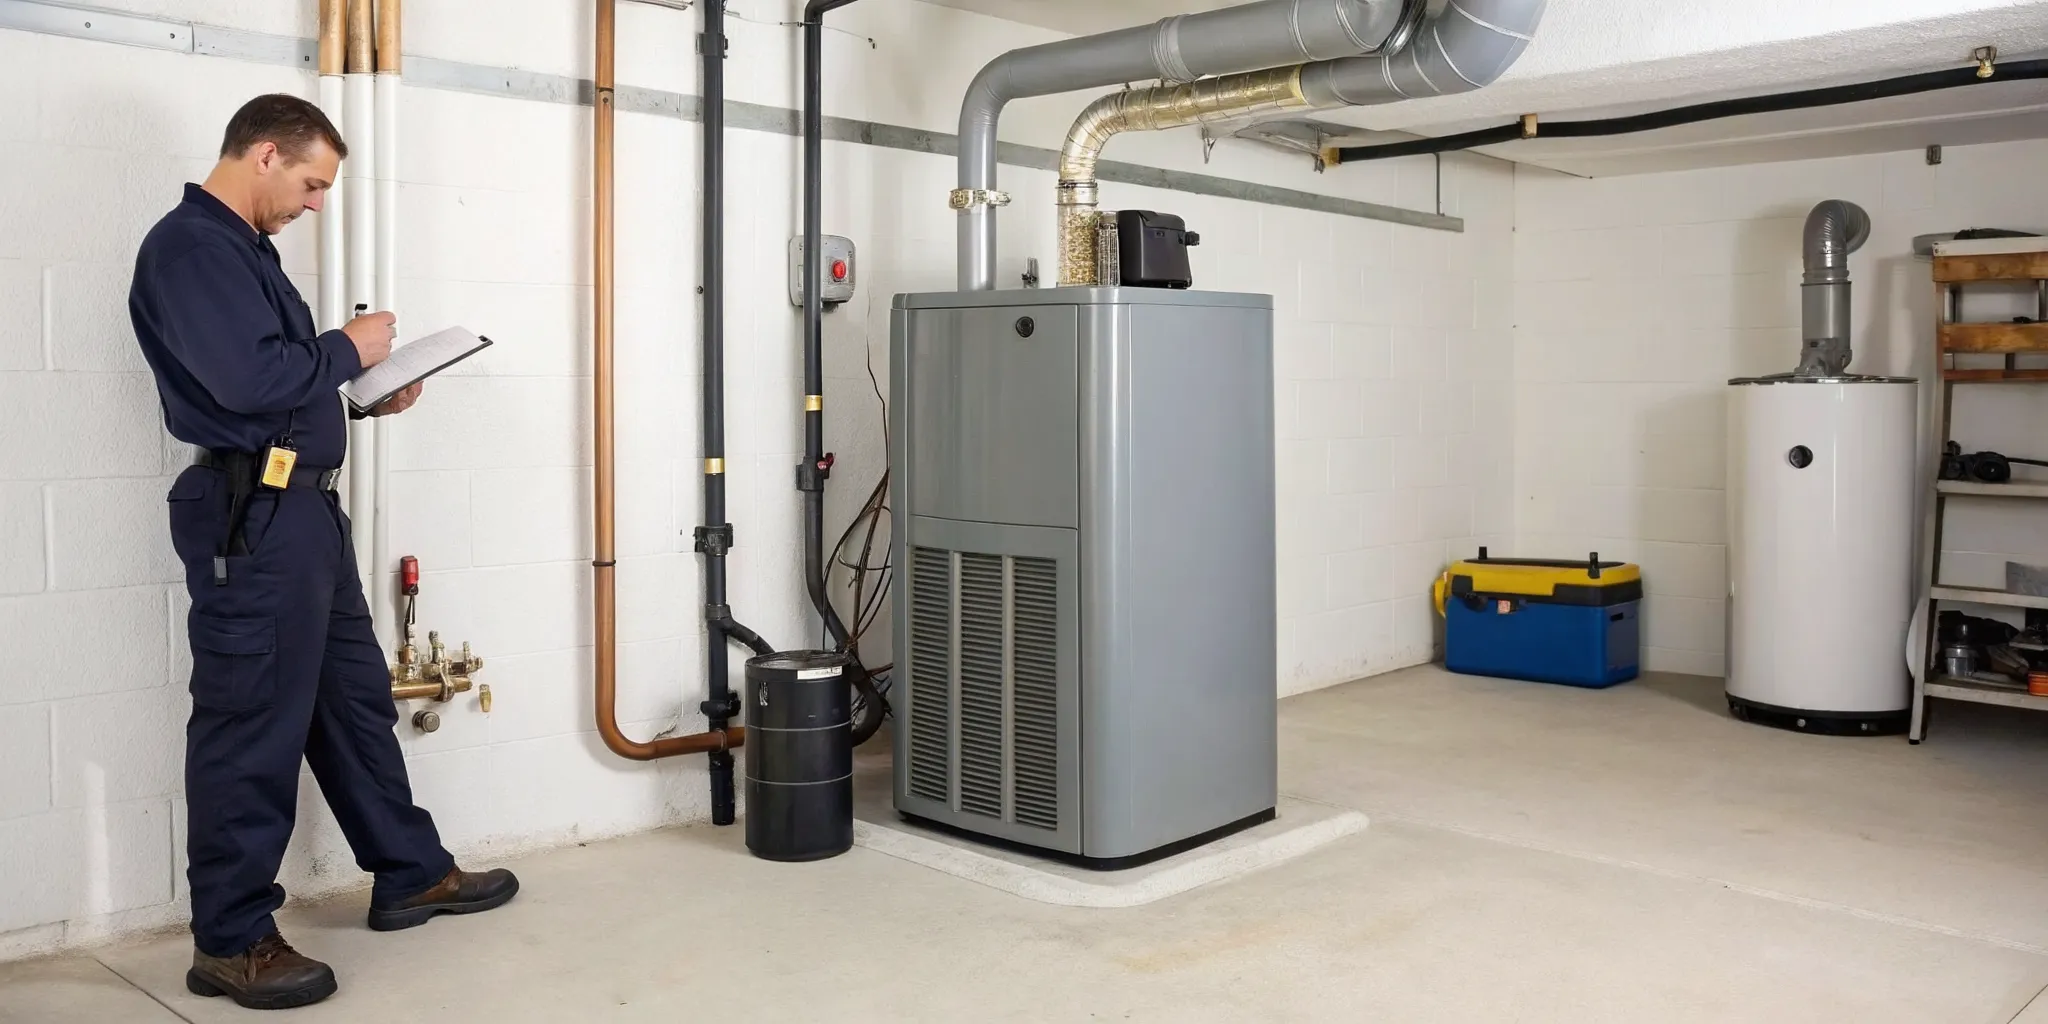
Before we even think about bringing in new equipment, one of our expert technicians will visit your home to perform a detailed assessment. This isn't just a quick glance; it's a crucial first step to guarantee your new system is the perfect match. We conduct what’s known as a "load calculation" to determine the exact size and capacity your home needs based on its square footage, layout, insulation, and window placement. We’ll also inspect your existing ductwork for any leaks or issues and check your electrical panel to confirm it can support the new unit. This careful planning ensures your system will run efficiently and effectively from day one.
Step 2: Preparing the Space for Your New Unit
On installation day, our crew treats your home with the utmost respect. We start by laying down protective coverings on your floors to keep everything clean and prevent any damage. Then, we’ll begin the process of safely disconnecting and removing your old HVAC equipment. This includes properly handling and recovering any old refrigerant according to strict environmental regulations. You won’t have to worry about a thing; we take care of hauling away all the old components for responsible disposal. Our goal is to make the transition as seamless as possible, showing the care and professionalism our company is known for.
Step 3: Installing the New Trane System
This is where your new, high-performance Trane system comes to life. Our technicians will start by setting the outdoor condenser unit on a sturdy, level pad. This is essential for minimizing vibration and ensuring the unit operates correctly for years to come. Inside, we’ll install the new air handler or furnace, typically in an attic, closet, or crawlspace. We take great care in connecting the refrigerant lines, drainage pipes, and electrical wiring with precision. Every connection is double-checked to meet Trane’s specifications and local building codes, ensuring your system is not only effective but also completely safe.
Step 4: Testing and Final Checks
Once everything is physically in place, we move on to the final and most critical phase: testing. We don’t consider the job done until we’ve verified that your new system is running at peak performance. Our technicians will charge the system with the precise amount of refrigerant, measure airflow, and check temperature differentials to ensure everything is calibrated perfectly. We’ll run a full diagnostic cycle to confirm all safety features are working and that the thermostat is communicating correctly. This final check guarantees you get the efficiency and comfort you paid for, setting you up for long-term success and helping you get the most out of your future AC maintenance.
What Does a Professional Installer Use?
When a professional technician arrives at your home, they bring more than just a new Trane unit. They come equipped with specialized tools, high-quality parts, and years of training. This preparation is what separates a quick fix from a lasting, reliable installation. Understanding what goes into a professional job can give you confidence that your investment is in good hands. It’s about having the right equipment to handle every detail, from securing the unit to calibrating the system for our unique Florida climate. A DIY attempt or a job done by a handyman might look fine on the surface, but it often lacks the precision that guarantees long-term performance and safety.
A proper air conditioning installation requires a specific set of skills and equipment. Professionals use everything from lineman’s pliers and wire strippers for electrical work to powerful drills and sturdy ladders for securing equipment and adjusting ductwork. It’s not just about having the tools, but knowing exactly how and when to use them to ensure every connection is solid and every component is perfectly placed. This expertise prevents common issues like refrigerant leaks, electrical faults, and poor airflow down the road, ensuring your system runs efficiently from day one and saving you from future headaches and costly repairs.
The Right Tools for the Job
You might be surprised by the sheer number of specialized tools needed for a smooth HVAC installation. A technician’s toolkit includes essentials like magnetic nut drivers, multi-bit screwdrivers with insulated handles to prevent shock, and utility knives for precise cuts. They also carry equipment like reliable ladders and powerful drills to safely install copper tubing or adjust ductwork in tight spaces. Having these specific tools on hand means the job is done correctly and efficiently, without cutting corners or making do with the wrong equipment. It’s this level of preparedness that ensures a safe and precise installation every time.
Quality Parts and Safety Gear
Beyond tools, a professional installation relies on using the right components. We strictly use Original Equipment Manufacturer (OEM) parts, which are the genuine parts from Trane. This is crucial because it ensures your system performs at its best, maintains its energy efficiency, and keeps your warranty valid. Our licensed and insured technicians also follow the manufacturer's installation instructions to the letter, guaranteeing that every part, especially critical components like the condensate removal system, functions exactly as designed. This commitment to quality parts and procedures gives you peace of mind knowing the job was done right.
Common Installation Mistakes to Avoid
Getting a new Trane system is a big investment in your home’s comfort. The last thing you want is for a preventable mistake to undermine its performance from day one. A proper air conditioning installation sets you up for years of efficiency and reliability, while a poor one can lead to headaches and extra costs. Knowing what can go wrong is the first step to making sure everything goes right. Let’s walk through some of the most common installation pitfalls so you can steer clear of them.
Wrong System Size or Poor Ductwork
Bigger isn't always better when it comes to air conditioners. A unit that’s too large for your home will cool the space too quickly and shut off, a process called short cycling. This constant starting and stopping causes unnecessary wear and tear and doesn't give the system enough time to properly dehumidify the air. On the flip side, a unit that’s too small will run constantly without ever reaching the set temperature, driving up your energy bills. Equally important is your ductwork. Leaky or poorly designed ducts can lose a significant amount of cool air before it ever reaches your rooms, making even the best Trane unit inefficient.
Bad Unit Placement and Faulty Wiring
Where your AC unit is placed matters more than you might think. The outdoor condenser needs plenty of space for proper airflow, away from obstructions like fences, shrubs, or low-hanging roofs. The indoor unit also needs to be installed in a location that allows for easy maintenance and optimal air distribution. Even more critical is the electrical wiring. Faulty wiring is not just an efficiency issue; it’s a major safety hazard that can lead to system failure or even a fire. This is one area where professional expertise is non-negotiable to ensure everything is connected safely and up to code.
Cutting Corners and Skipping Steps
It can be tempting to save a few dollars by hiring an uncertified handyman or attempting a DIY installation, but this often costs much more in the long run. Professional installers follow a precise process for a reason. Skipping steps like properly sealing ductwork, correctly charging the refrigerant, or verifying the system’s airflow can lead to leaks, poor performance, and a shorter lifespan for your new unit. A rushed or sloppy job can also void your Trane warranty, leaving you on the hook for future air conditioning repairs. Always work with licensed and insured technicians to protect your investment.
Why Professional Installation Is a Must
Tackling a home project yourself can be incredibly rewarding, but installing a new Trane HVAC system isn't the time to test your DIY skills. While it might seem like a way to save money, an improper installation can lead to serious safety issues, poor performance, and costly repairs that wipe out any initial savings. This is a complex job that involves high-voltage electricity, chemical refrigerants, and specific local building codes that only a trained professional will understand. An incorrectly installed unit can leak carbon monoxide, create fire hazards from faulty wiring, or release harmful refrigerants into the environment. Beyond the immediate dangers, it can also lead to poor airflow, inconsistent temperatures, and higher energy bills. A professional installation is more than just a service; it's an investment in your home's safety, comfort, and long-term efficiency. When you work with a team of licensed and insured technicians, you get the assurance that every connection is secure, every setting is optimized, and your system is ready to handle the Florida heat. It’s about having the peace of mind that the job is done right the first time, protecting both your new system and your family.
For Your Safety and to Meet Local Codes
Your HVAC system is one of the most intricate pieces of equipment in your home. It involves handling chemical refrigerants and connecting complex electrical wiring, both of which pose significant safety risks if managed incorrectly. Our fully licensed and insured technicians are trained to handle these materials safely and according to industry best practices. Plus, Florida has specific building codes that govern HVAC installation to ensure every system is safe and efficient. A professional installer understands these local requirements and will make sure your new Trane unit is fully compliant, so you won’t have to worry about failing an inspection or facing potential fines.
To Protect Your Warranty and Ensure Peak Performance
Even the highest-quality Trane system won't deliver the comfort and efficiency you expect if it's not installed correctly. Manufacturers require that their systems be installed by certified professionals to keep the warranty valid. An improper installation can void your warranty, leaving you responsible for the full cost of any future repairs. Professional air conditioning installation ensures every component is set up according to the manufacturer's exact specifications. This guarantees your system runs at peak performance from day one, providing reliable cooling and helping you get the most out of your investment.
For Long-Term Savings and Peace of Mind
A professional installation sets your new Trane system up for a long and efficient life. When your unit is installed correctly, it runs more efficiently, which translates directly into lower monthly energy bills. A properly installed system also experiences less strain, reducing the likelihood of premature breakdowns and extending its lifespan. This means you can enjoy reliable comfort for years to come without the stress of unexpected problems. Choosing a professional gives you peace of mind, knowing your home is in good hands and your investment is protected. Just ask our many satisfied customers who enjoy the comfort and reliability of a job well done.
How to Prepare for Installation Day
The big day is almost here! Your new Trane system is ready to be installed, and a little prep work can make the entire process seamless for you and our technicians. Knowing what to expect helps everything go smoothly, from the moment our truck pulls up to the final system check. We handle the heavy lifting, but a few simple steps on your end can make a huge difference. This guide will walk you through how to get your home ready, what our team will be doing, and how to care for your new system once it’s up and running.
Your Pre-Installation Checklist
To help our team work safely and efficiently, here are a few things you can do before we arrive:
- Clear the Way: Make sure there’s a clear path from the driveway to your indoor and outdoor units. This includes moving any furniture, rugs, or decorations that might be in the way. Also, tidy up the area around the units themselves.
- Secure Your Pets: We love pets, but an open door and new people can be stressful for them. Please keep your furry friends in a separate, secure room until the installation is complete.
- Plan to Be Home: We’ll need you to be home for the installation to grant access and answer any questions. Please keep your phone handy so we can easily reach you. At the end, we’ll show you how to operate your new thermostat.
What Happens on the Day Of?
When our licensed technicians arrive, they’ll start by protecting your home. We lay down floor coverings to keep your space clean from start to finish. First, we’ll safely disconnect and remove your old equipment, making sure to handle and dispose of old refrigerant according to environmental regulations. Next comes the main event: the air conditioning installation. Our team will set the new indoor and outdoor units, connect the electrical wiring and new copper refrigerant lines, and hook everything up to your thermostat. Before we leave, we conduct a thorough series of tests to ensure your new Trane system is running perfectly, checking everything from airflow to temperature accuracy.
Caring for Your New System
Your new Trane system is a major investment in your home’s comfort, and a little care will help it perform efficiently for years. The most important thing you can do is change the air filter regularly, typically every one to three months. A clean filter allows for proper airflow and keeps dust out of the system. You should also keep the area around your outdoor unit clear of leaves, branches, and other debris. For total peace of mind and to protect your warranty, consider a professional air conditioning maintenance plan. Regular tune-ups catch small issues before they become big problems, ensuring your system runs at peak performance.
Related Articles
- Benefits of Regular HVAC Maintenance
- HVAC Installation Services
- HVAC Tips & Insights Blog - Expert Advice from 5 Star Air
- Duct Replacement Services
- How to Prepare Your HVAC for a Florida Summer
Frequently Asked Questions
How long does a typical Trane installation take? For most homes, a standard installation is a full-day job. We take our time to make sure every step, from removing your old unit to testing the new one, is done with precision. Rushing the process can lead to mistakes, so we dedicate the necessary hours to ensure your system is set up perfectly for long-term performance and reliability.
Is it really worth paying more for a higher SEER rating in Florida? In many cases, yes. Think of it as an investment that pays you back over time. Because our air conditioners run so frequently here in Florida, the energy savings from a higher-efficiency unit add up quickly on your monthly bills. While the initial cost is higher, the long-term savings can often make a high-SEER Trane system the more economical choice over its 15-year lifespan.
What happens if you find problems with my ductwork during the assessment? This is actually quite common, especially in older homes. If our technician discovers issues like leaks or poor design in your existing ductwork, we will stop and discuss the findings with you immediately. We’ll explain your options clearly, whether it’s sealing the ducts or considering a replacement, so you can make an informed decision without any pressure.
How can I be sure I'm getting the right size system for my home? We take the guesswork out of it by performing a professional load calculation. This isn't just based on square footage; we analyze your home's layout, window efficiency, insulation levels, and even sun exposure. This detailed assessment allows us to determine the exact capacity your home needs for consistent cooling and optimal dehumidification, ensuring you get a system that is truly a perfect fit.
What can I do to make my new Trane system last as long as possible? The best things you can do are simple. Change your air filter every 1-3 months to maintain healthy airflow and keep the outdoor unit clear of any leaves or debris. Beyond that, the most effective way to protect your investment and ensure peak performance is to schedule regular professional maintenance. An annual tune-up allows a technician to catch small issues before they become major problems.