How to Replace Ductwork in Existing Walls: A Guide
Let’s be honest: the idea of tearing into your walls is intimidating. But when your home is consistently uncomfortable or your energy bills are out of control, you know something has to change. Often, the problem lies within your ductwork. While this is a job best left to professionals, understanding the process empowers you as a homeowner. Knowing how to replace ductwork in existing walls helps you ask the right questions, understand a contractor’s quote, and feel confident that the job is being done correctly. This guide will give you that knowledge, breaking down the project from start to finish so you can move forward with a clear plan for a more comfortable and efficient home.
Key Takeaways
- Listen to Your Home's Clues: If you're dealing with high energy bills, dusty air, or rooms that won't stay cool, your hidden ductwork is likely the cause. These issues are clear signals that it's time for a professional inspection.
- Details Determine Efficiency: A successful ductwork replacement depends on the small stuff. Using mastic sealant on every joint and properly insulating the ducts are critical steps that prevent energy waste and guarantee better performance.
- Know Your Options Before Tearing Down Walls: A full replacement isn't always necessary. Less disruptive solutions like professional duct sealing or ductless mini-split systems can solve your issues, but this is a job where professional expertise is essential for safety and results.
Is It Time to Replace the Ductwork in Your Walls?
Your home’s ductwork is a bit like its circulatory system—hidden behind walls and in ceilings, it’s easy to forget it’s there. But this network of tubes is responsible for carrying conditioned air from your HVAC unit to every room, playing a huge role in your comfort, energy bills, and even the air you breathe. While ductwork is built to last, it doesn’t last forever. Over time, ducts can deteriorate, leak, or become contaminated with dust, mold, and pests. When this happens, your AC system has to work much harder to keep you cool, driving up your energy costs and compromising your home’s air quality.
Figuring out if your ducts are the source of your problems can be tricky, but there are some clear indicators that it might be time for an upgrade. Ignoring these signs can lead to bigger, more expensive problems down the road, not to mention an uncomfortable living environment. If you’ve noticed your home isn’t as comfortable as it used to be or your utility bills are creeping up, your ductwork could be the culprit. Let’s walk through the key signs to look for, how age and materials play a part, and how to weigh the cost of replacement against the long-term benefits.
Signs Your Ductwork Needs an Upgrade
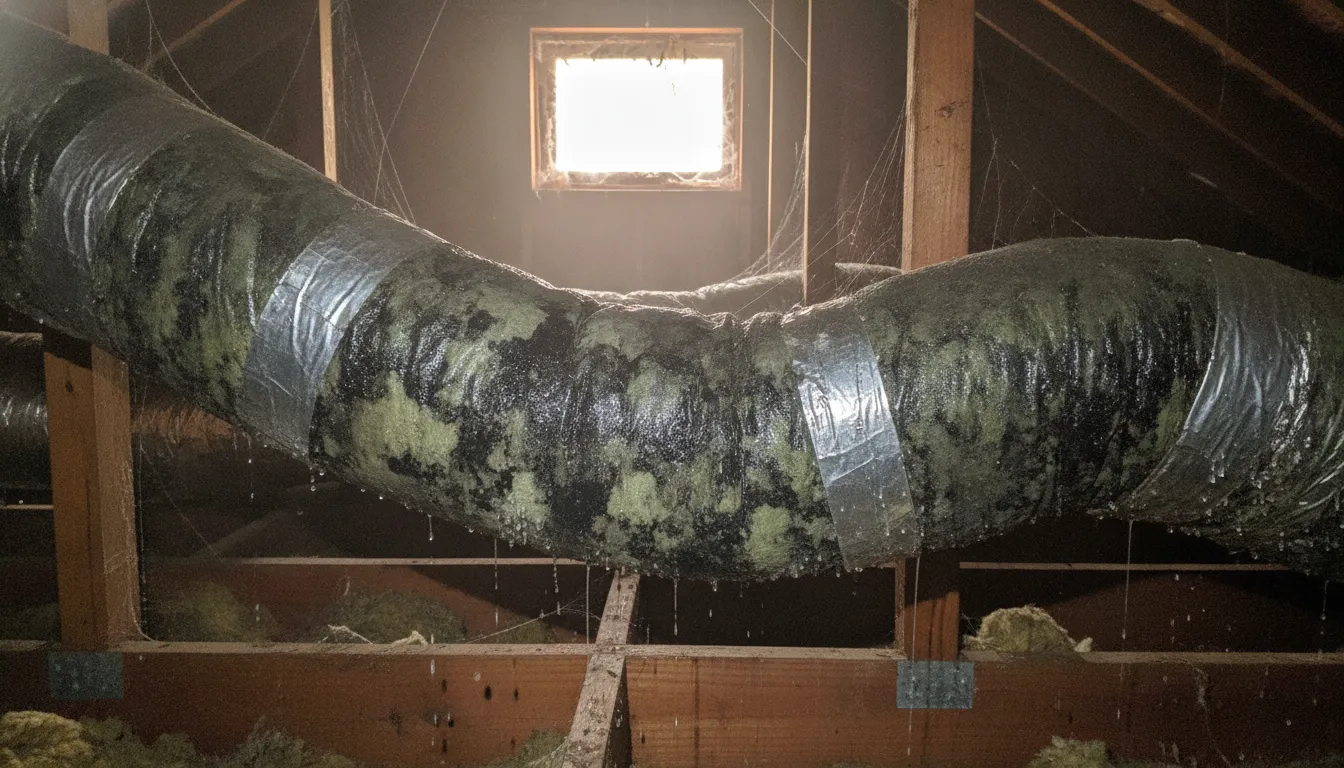
Not sure if your ducts are failing? Your house will give you clues. One of the most obvious signs is a sudden spike in your energy bills. If your AC is running constantly but your home isn’t getting cooler, leaky or poorly insulated ducts could be wasting conditioned air. You might also notice uneven temperatures, with some rooms feeling stuffy while others are chilly. Pay attention to the air itself—excessive dust, musty odors, or worsening allergies can point to dirty, moldy, or breached ducts that are harming your indoor air quality. Also, listen for strange noises like rattling or whistling, and take a look at any visible ductwork for signs of damage like kinks, tears, or rust.
How Age and Materials Factor In
The age of your home is a big piece of the puzzle. Many homes built before the 1980s used materials that are now outdated and inefficient. If your home has old "flex duct"—that foil-like tubing often wrapped in yellow or black insulation—it’s likely degrading and circulating dust and fiberglass particles. Most ductwork has a lifespan of about 15 to 25 years, so if yours is older, it’s worth getting it inspected. The cost to replace ductwork can range from $25 to $55 per linear foot, depending on the materials you choose and the complexity of the job. Modern materials are more durable and efficient, making replacement a smart update for an older home.
Weighing the Costs vs. the Benefits
The thought of replacing your ductwork can feel daunting, especially when you consider the cost. But it’s helpful to think of it as a long-term investment in your home’s health and efficiency. Leaky ducts can be a major source of energy waste. In fact, making the switch to a properly sealed and insulated system can lower your cooling costs by up to 30%. Beyond the savings, you’ll enjoy more consistent temperatures throughout your home and significantly cleaner air. For anyone with allergies or respiratory issues, this is a game-changer. A full replacement often includes duct sanitization, ensuring you start fresh with a system that supports your family’s well-being.
What Tools and Materials Will You Need?
Before you even think about opening up a wall, you need to gather the right equipment. Going into a ductwork replacement project prepared not only makes the job go smoother but also keeps you safe. Think of it as your pre-flight check. Having everything on hand means you won't have to make frustrating trips to the hardware store mid-project. This preparation is the first step toward a successful installation and a more comfortable home.
Your Essential Tool Checklist
Installing ductwork in existing walls can be a challenge, especially in older homes where you might be working around unexpected framing or wiring. Having the right tools makes all the difference. You’ll want a good flashlight to inspect the existing ducts for damage like holes or disconnected joints before you even start.
Here’s a solid list of tools to have ready:
- Drill with various bits
- Drywall saw or utility knife
- Measuring tape
- Tin snips or aviation shears for cutting metal ducts
- Duct crimper and hand seamer
- Caulking gun for sealant
- Sturdy ladder
- Work light or headlamp
Choosing the Right Ductwork Materials
The materials you choose will directly impact your HVAC system's performance and your energy bills. Duct sizing is one of the most critical steps; if your ducts are too small or too large for your system, it will struggle to move air efficiently. You’ll generally choose between flexible, rigid, or semi-rigid ducts. While insulated ducts might cost more upfront, they are a smart investment for Florida homes, as they improve energy efficiency by reducing heat gain in your attic or walls. This is a key part of any quality air conditioning installation.
Must-Have Safety Gear
Your safety should always come first. Before you start any work, make sure the power to your HVAC system is completely turned off at the circuit breaker. Old ductwork can hide sharp metal edges, dust, mold, and other debris you don’t want to inhale. If you suspect you're dealing with hazardous materials like asbestos, stop immediately and call a professional.
Here’s the essential safety gear you’ll need:
- Heavy-duty work gloves
- Safety glasses or goggles
- A dust mask or, even better, a NIOSH-approved respirator
- Long-sleeved shirt and pants to protect your skin
Handling these projects requires care, which is why our licensed and insured technicians always come equipped with the right protective gear.
How to Safely Remove Old Ductwork
Removing old ductwork isn't just about pulling things out of the wall; it’s about doing it safely and methodically to prepare for a high-performing new system. A careful approach protects you from hidden hazards and prevents unnecessary damage to your home. Before you pick up a single tool, taking the time to plan your removal process will make the installation of your new ducts much smoother. Think of it as setting the stage for better air quality and efficiency down the road.
Plan Your Wall Access Points
First things first, you need a clear plan of attack. Start by clearing the area around your vents, registers, and any visible ductwork in your attic or crawlspace. This gives you a safe, open workspace. If you have them, your home’s original blueprints can be a goldmine, showing you exactly where the ducts run. Otherwise, a good stud finder can help you map out the pathways behind the drywall. It’s also smart to note any nearby electrical wiring or plumbing. This initial survey helps you understand the scope of the project and prepare for the work ahead, ensuring your duct replacement goes off without a hitch.
Handle Hazardous Materials with Care
If your home was built before the 1980s, your old ductwork might contain materials like asbestos or be wrapped in fiberglass insulation that can be harmful if disturbed. Handling these materials requires special precautions. This is one area where DIY can be dangerous. For your safety, it’s best to work with certified professionals who have the right protective gear and equipment, like HEPA vacuums, to contain airborne particles. Our team of fully licensed and insured technicians at 5 Star Air is trained to safely manage and remove hazardous materials, giving you peace of mind that the job is done right.
Properly Remove and Dispose of Old Ducts
Once you have clear and safe access, you can begin removing the old ducts. Start by disconnecting the duct sections from the vents and the main trunk line. You might find old, abandoned ducts that lead nowhere—it’s a good idea to remove these completely, as they can become homes for pests or collect dust. As you take out each section, seal it in heavy-duty plastic bags to prevent dust and debris from spreading throughout your home. Proper disposal is also key; check your local regulations for disposing of construction materials, especially if you suspect they contain hazardous substances.
Tips to Minimize Drywall Damage
Let’s be honest: replacing ductwork hidden in walls often requires cutting into drywall. While it might seem daunting, sometimes it’s the only way to ensure a complete and proper replacement. To keep the mess to a minimum, use a utility knife to score the paint and tape lines before you cut. This creates a cleaner edge and prevents peeling. A drywall saw will give you more control than a reciprocating saw. Whenever possible, make your cuts along the edge of a wall stud, as this makes patching the wall much easier later. A little precision here saves a lot of repair work after your new air conditioning system is installed.
Your Step-by-Step Guide to Installing New Ductwork
Replacing the ductwork inside your walls is a significant undertaking, but with a clear plan, you can approach it with confidence. Think of it as upgrading your home’s entire respiratory system—getting it right means better airflow, improved efficiency, and a more comfortable living space, which is essential in the Florida heat. This guide breaks down the process into five manageable steps, from initial planning to final testing. While this is a detailed overview for the hands-on homeowner, remember that a flawless installation is key to your system's performance. For a job that guarantees perfect results and peace of mind, working with a professional for your air conditioning installation is always the best path. Let’s walk through what it takes to get the job done correctly.
Measure and Plan Your New Duct Routes
Before you cut a single piece of material, you need a solid plan. The first step is to map out exactly where your new ducts will go and determine how much air each room needs to stay comfortable. Start by sketching a simple layout of your home, marking the location of vents and your HVAC unit. You’ll need to calculate the heating and cooling load for each room to ensure the duct size is appropriate—too small, and the room will be stuffy; too large, and you’ll waste energy. This blueprint will be your guide, helping you avoid obstacles like plumbing, electrical wiring, and structural supports inside the walls.
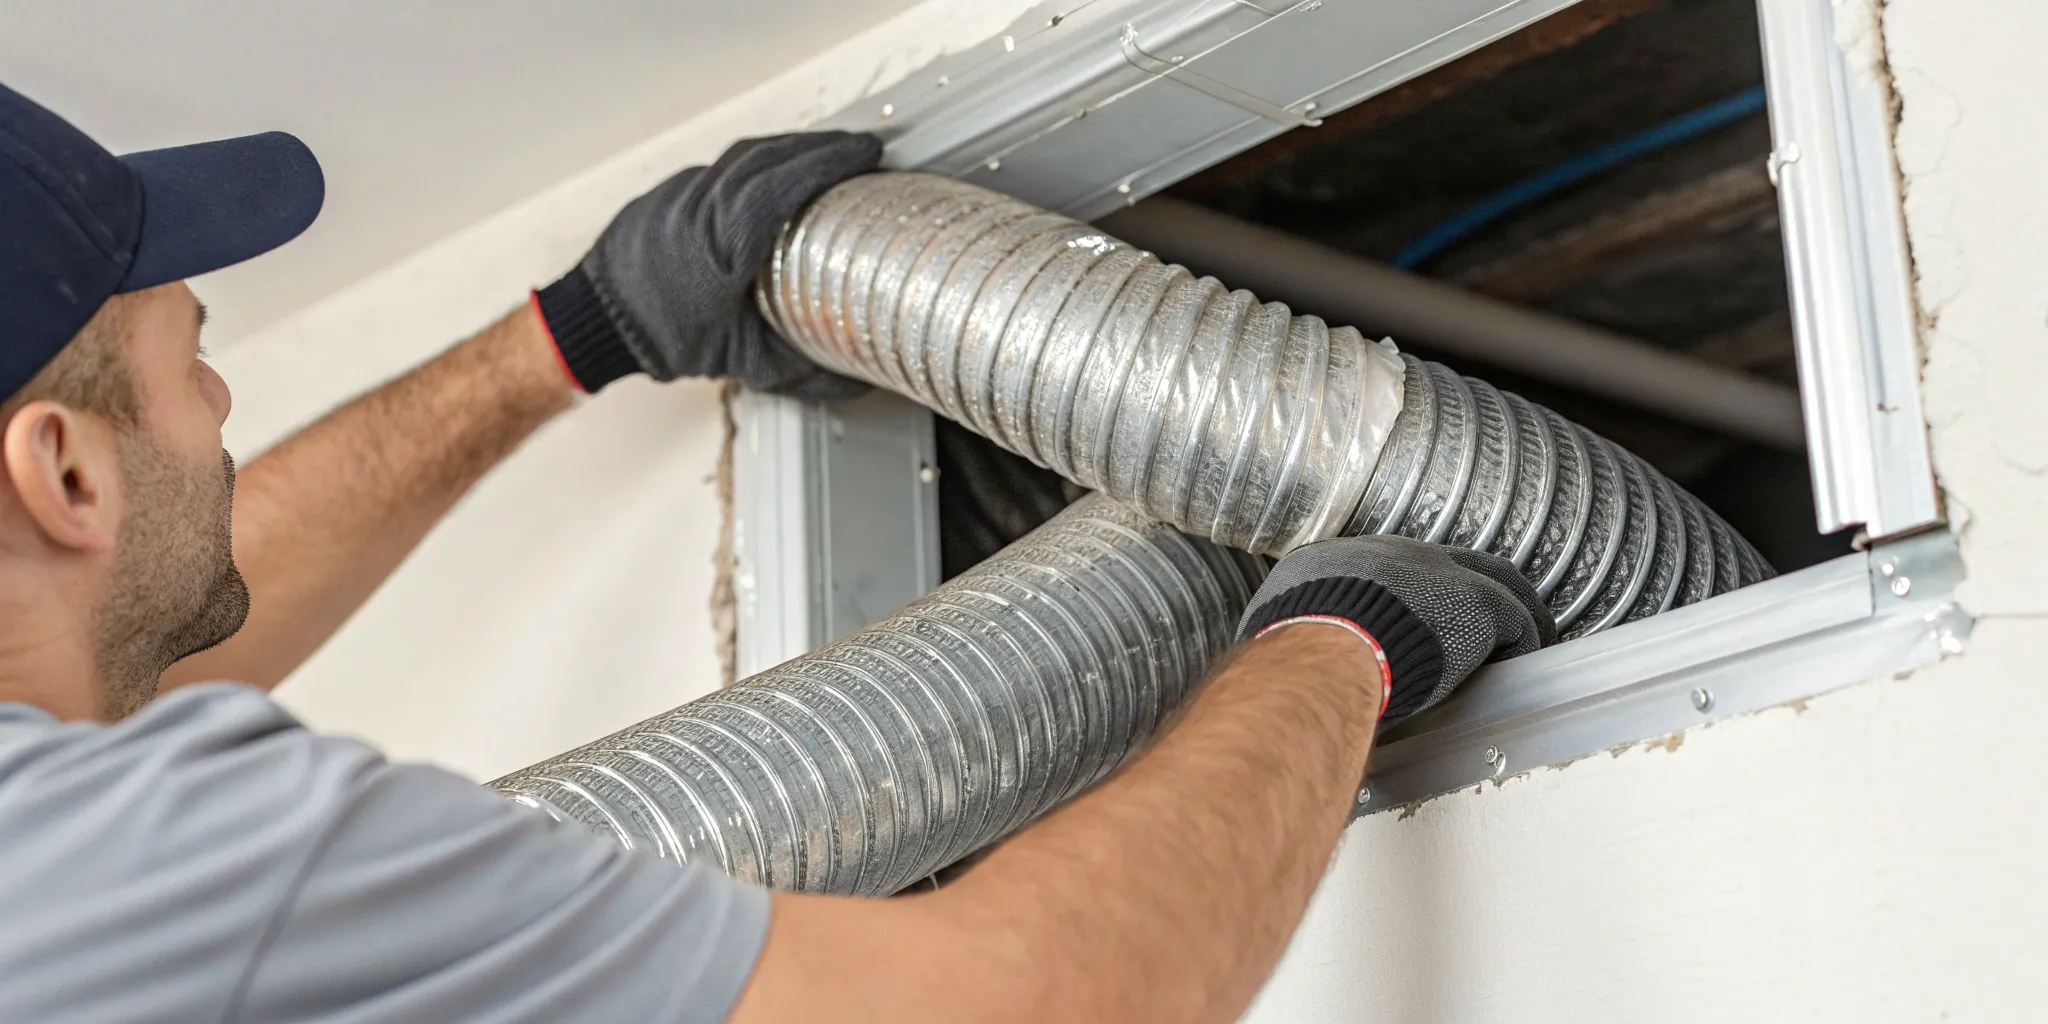
Install and Secure the New Ducts
With your plan in hand, you can begin the installation. Start by running the main trunk lines, which are the large ducts that supply air to the smaller branch ducts. From there, you can connect the individual runs that lead to each room. As you connect each section, it’s vital to secure the ductwork properly using metal straps or hangers every few feet. This prevents sagging, which can create kinks and low spots where moisture can collect or airflow can become restricted. A well-supported system ensures air moves freely and efficiently, which is the entire goal of a ductwork replacement.
Seal All Joints and Connections
Even the best-planned duct system will fail if it leaks. Every seam and connection is a potential spot for conditioned air to escape into your walls or attic, wasting money and reducing your comfort. To prevent this, you must seal every joint meticulously. Forget about that roll of grey "duct tape"—it breaks down over time and isn't designed for this job. Instead, use a specialized foil tape (look for one that is UL 181-rated) or a brush-on sealant called mastic. Applying a thick layer of mastic over each connection creates a permanent, airtight bond that ensures all the air you’re paying to cool reaches its destination.
Insulate for Better Energy Efficiency
In Florida, insulation is your ductwork’s best friend. Any ducts running through unconditioned spaces like an attic, crawlspace, or garage must be insulated to prevent energy loss. Insulation keeps the cool air inside the ducts from warming up as it travels through a hot attic, ensuring the air that comes out of your vents is the temperature you set on the thermostat. It also prevents condensation on the outside of the ducts, which can lead to moisture issues and mold growth. While insulated ducts have a higher upfront cost, the improvement in energy efficiency and comfort makes them a worthwhile investment.
Test and Balance Your New System
Once everything is installed, sealed, and insulated, it’s time for the final check. Turn on your HVAC system and go to each vent to feel the airflow. Does it feel weak in some rooms and too strong in others? If so, your system may need to be balanced. Balancing involves adjusting small dampers inside the ducts to ensure each room receives the correct amount of air based on your initial plan. While you can check for obvious issues yourself, achieving a perfectly balanced system often requires specialized tools. A final inspection and balancing by a professional will confirm your HVAC system is operating smoothly and at peak efficiency.
Are There Less Invasive Alternatives?
The thought of cutting into your walls to replace ductwork is enough to make any homeowner anxious. It sounds messy, disruptive, and expensive. But before you start mentally preparing for a major renovation, take a deep breath. Tearing everything apart isn't your only option. In many cases, especially in older homes or those with unique layouts, less invasive solutions can deliver the comfort and efficiency you need without the headache of a full-scale replacement.
Exploring these alternatives can save you time, money, and a lot of dust. From systems that don't require ducts at all to targeted repairs that fix the problem at its source, there's likely a path forward that fits your home and your budget. The key is understanding what's available and getting an honest assessment of your current system. A professional can help you determine if a simple repair will suffice or if a modern, less intrusive system is the right choice to improve your home's indoor air quality and comfort.
Consider Ductless Mini-Split Systems
If the idea of installing any ductwork at all feels overwhelming, ductless mini-split systems might be your perfect solution. These systems, also known as heat pumps, don't need a network of ducts to cool your home. Instead, an outdoor compressor connects directly to one or more indoor air-handling units mounted on the wall or ceiling. This makes them incredibly versatile and much easier to install, especially in older homes, new additions, or specific rooms you want to cool independently. They are also highly energy-efficient, giving you precise temperature control right where you need it.
Explore High-Velocity HVAC Systems
For homeowners who want the even, whole-house cooling of a central system without the bulky ductwork, a high-velocity HVAC system is an excellent alternative. These systems use much smaller, flexible ducts—often just a few inches in diameter—that can be snaked through existing walls, ceilings, and tight spaces with minimal disruption. This makes them an ideal choice for historic homes or buildings where preserving the original structure is a priority. You get the benefits of central air without having to sacrifice your home's character (or your walls).
Opt for Professional Duct Sealing and Repair
Sometimes, your ductwork doesn't need to be completely replaced—it just needs some professional attention. Over time, ducts can develop leaks, come apart at the seams, or lose insulation, leading to poor airflow and wasted energy. Instead of a full replacement, professional duct sealing and repair can often solve the problem. Technicians can identify and seal leaks, re-secure connections, and add insulation, restoring your system's efficiency and performance. This targeted approach is far less invasive and more cost-effective than starting from scratch.
When to DIY vs. When to Call a Professional
While the DIY spirit is admirable for many home projects, ductwork installation isn't one of them. We strongly advise homeowners not to install ductwork themselves. Proper installation requires a deep understanding of airflow dynamics, pressure balancing, and local building codes, not to mention specialized tools. A poorly designed or installed system can lead to inefficiency, poor air quality, and even damage to your HVAC unit. For a job this critical to your home's comfort and safety, it's always best to contact a professional. We can ensure the job is done right the first time.
Frequently Asked Questions
How can I tell if I need my ducts cleaned, repaired, or completely replaced? That’s a great question, as the right solution depends on the specific problem. Think of it this way: cleaning is for when your ducts are structurally sound but are circulating dust and allergens. A repair is a good option if you have a specific, isolated issue, like a disconnected joint or a single leak. A full replacement is necessary when the ductwork is old, deteriorating, poorly designed, or has widespread damage that can't be patched effectively. The best way to know for sure is to have a professional take a look.
My house is older, but my AC seems to work fine. Should I still be concerned about my ductwork? Even if your home feels cool enough, the original ductwork in an older house could be costing you money and affecting your health. Decades-old ducts are often inefficient, uninsulated, and can break down over time, circulating fiberglass particles and dust. You might be paying much more on your energy bills than you need to because conditioned air is leaking into your walls and attic. An inspection can reveal these hidden issues and show you how much more efficient and healthy your home could be.
What are the biggest benefits I'll notice after replacing my old ductwork? The most immediate change most people notice is consistent comfort—no more hot or stuffy rooms. You’ll also likely see a welcome drop in your monthly energy bills, since your AC system won't have to work overtime to compensate for leaks. Beyond comfort and savings, the improvement in your home's air quality is a huge benefit. With new, clean, and properly sealed ducts, you're ensuring your family is breathing healthier air, which can make a real difference for anyone with allergies or respiratory concerns.
How long does a typical ductwork replacement project take? The timeline really depends on the size and complexity of your home. For an average-sized house, a professional team can typically complete a full ductwork replacement in one to three days. They work efficiently to minimize disruption to your daily life. A more complex layout or a larger home might take a bit longer, but a good contractor will give you a clear and accurate timeline before any work begins.
Is replacing ductwork a messy process? While replacing ducts that are hidden in walls and ceilings does require careful work, it doesn't have to turn your home into a disaster zone. Professional technicians are trained to be as clean and respectful as possible. They use drop cloths and plastic sheeting to contain dust and debris to the work area and make sure to clean up thoroughly when the job is done. While some drywall cutting may be necessary, the goal is always to minimize the impact on your home.